Migrating data to your Epicor ERP system is an essential part of ensuring smooth and effective operations. The Epicor Data Management Tool (DMT) offers businesses a streamlined method to upload, modify, and manage data across various modules within Epicor. However, one of the most important steps in this process is structuring the Excel templates properly for the DMT upload. Incorrectly structured templates can lead to data errors, failed uploads, and a significant amount of time spent troubleshooting.
In this blog, we’ll walk you through the best practices for structuring Excel templates for Epicor DMT to ensure a smooth, error-free data migration. By following this step-by-step guide, you can reduce the risk of errors and make the upload process much more efficient.
At Epicforce Tech, we help businesses streamline their Epicor data management processes, providing expert support in data uploads and system integrations. Let’s dive into the specifics of structuring your Excel templates effectively.
Step 1: Understand Your Data Requirements
What You Need to Know:
Before creating the Excel template, it’s essential to understand what data you are uploading and which fields are required in Epicor DMT. Different Epicor modules (such as inventory, sales orders, or customers) have specific data requirements. Each template needs to align with these fields for a successful upload.
Key Considerations:
- Required Fields: Ensure you know which fields are mandatory for your upload. For example, fields like Item Number, Description, and Price might be required for an inventory upload.
- Optional Fields: Some fields might be optional, but including them can enrich your data and provide more accurate insights once the data is uploaded.
- Data Format: Ensure the data format matches what Epicor DMT expects, whether it’s text, numbers, dates, or other formats.
Epicforce Tech Tip:
Work closely with your internal stakeholders to gather the data and confirm which fields are required for the DMT upload. This will help avoid confusion and reduce the chances of uploading incomplete or incorrect data.
Step 2: Set Up Your Excel Template Columns
Creating Your Template:
The next step is to set up the Excel template with the correct columns based on the data you are uploading. Epicor DMT works with structured templates, where each column corresponds to a field in the Epicor system.
Here’s a simple breakdown of how you should set up your columns:
- Column A (Unique Identifier): For most uploads, a unique identifier (such as Item Number, Customer ID, or Sales Order ID) will be required. This will help Epicor DMT match the data in your template to the existing records in the system.
- Column B (Description/Name): A description or name of the entity you’re uploading (e.g., item description, customer name).
- Column C (Quantity/Amount): Depending on your data, this might be the quantity of items, total sales amount, or inventory levels.
- Column D (Date): Many modules, such as Sales Orders or Invoices, will require date fields. Ensure the date format is consistent with what Epicor expects (e.g., MM/DD/YYYY).
- Additional Columns: Add any other relevant fields as required by your specific Epicor module, such as Price, Account Number, or Location.
Epicforce Tech Tip:
Use column headers that align with the field names in Epicor DMT. This will make it easier for you to map the columns during the upload process.
Step 3: Ensure Data Consistency
Why It Matters:
Epicor DMT relies heavily on data consistency. Even a small inconsistency, like a wrong date format or a missing character, can cause the upload to fail. It’s crucial to clean your data and verify that all fields are correctly populated.
Best Practices for Data Consistency:
- Check for Missing Data: Ensure all required fields are populated. If any essential fields are missing, your upload will not be processed correctly.
- Data Formatting: Verify that all data is in the correct format (e.g., dates, numerical values, text).
- No Special Characters: Avoid special characters like commas, quotation marks, or symbols in your data as they may cause errors during the upload.
Epicforce Tech Tip:
Before uploading, run a data validation check in Excel to highlight any discrepancies or errors. This will save you time by catching issues early.
Step 4: Review and Map Your Data
What to Do:
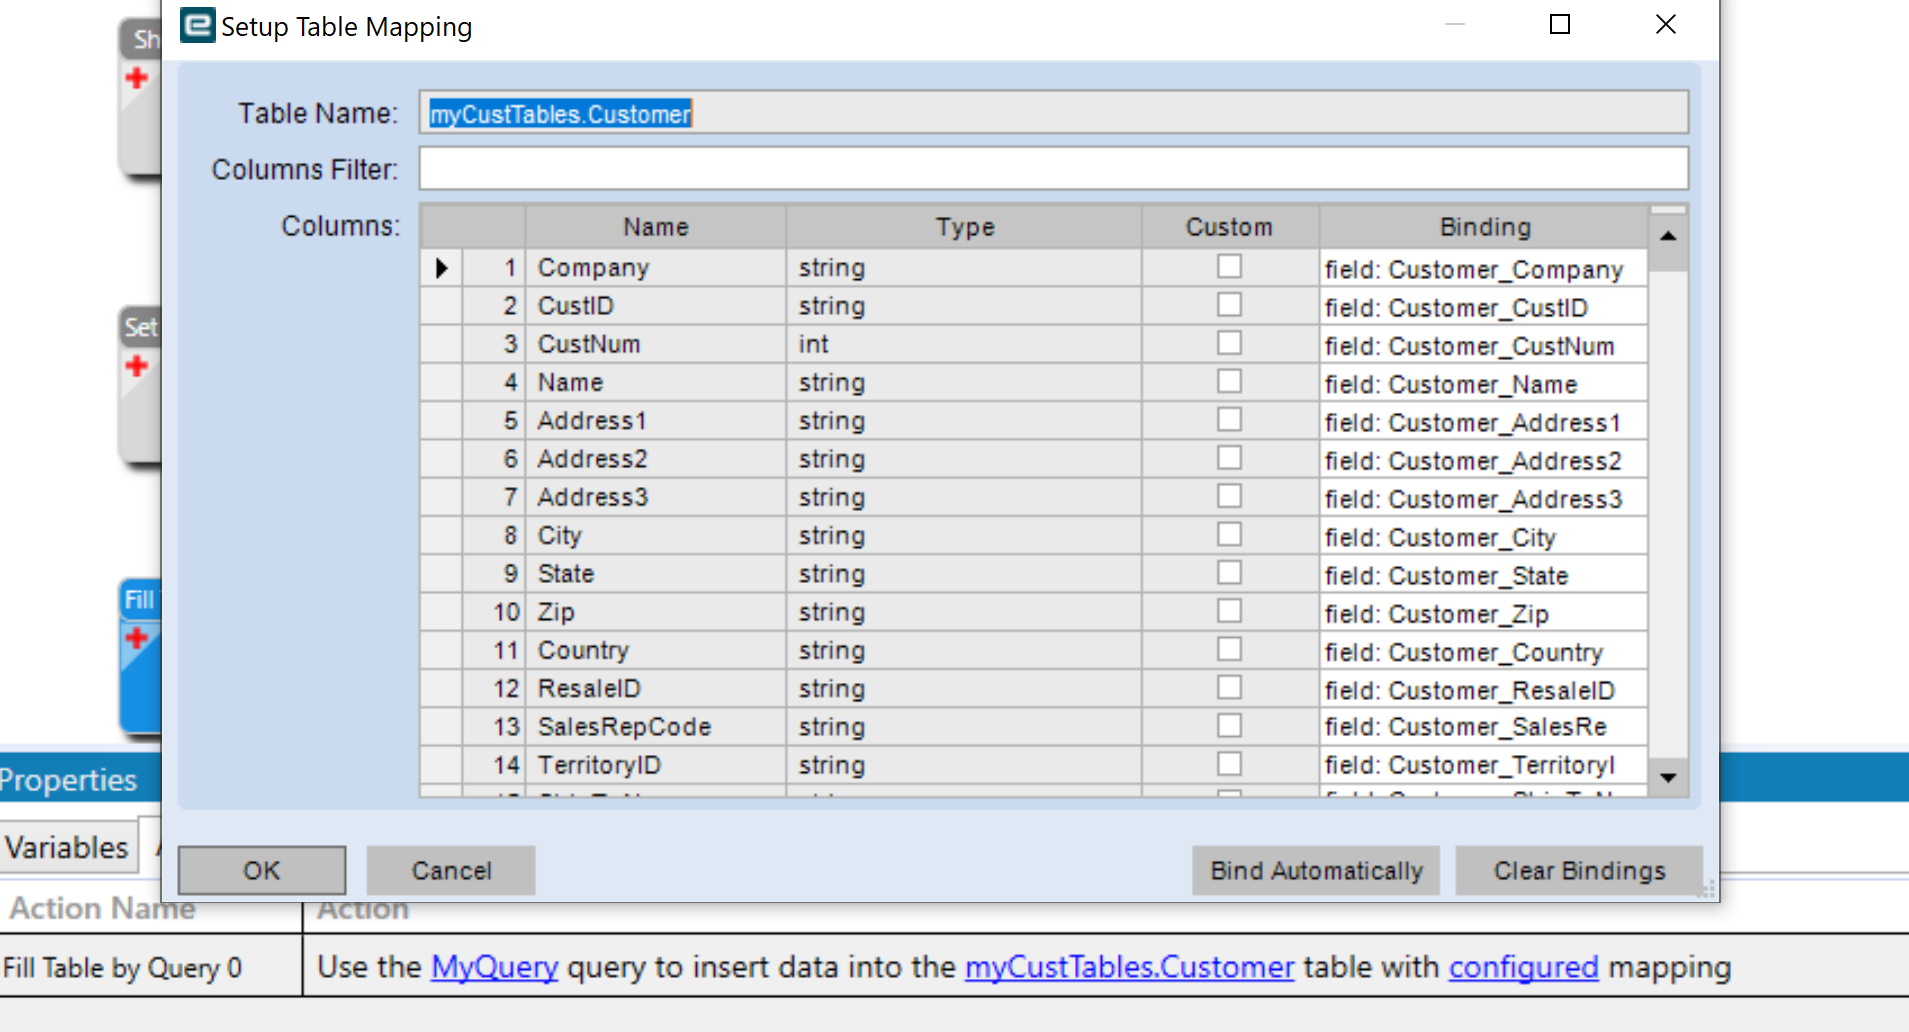
Once your Excel template is ready, the next step is to map the columns in your Excel file to the corresponding fields in Epicor DMT. Epicor DMT provides a mapping tool that allows you to match each column in your Excel sheet with the appropriate field in the Epicor system.
Steps for Effective Data Mapping:
- Open the Epicor DMT Mapping Tool.
- Select the upload template you are working with (e.g., inventory, sales orders).
- Match each column in your Excel template to the correct field in Epicor.
- Make sure there are no mismatches between Excel columns and Epicor fields.
Epicforce Tech Tip:
Mapping is crucial to ensure your data is correctly imported into Epicor. Double-check each mapping to prevent issues during the upload process.
Step 5: Validate and Test Your Template
Why Testing Matters:
Before uploading the full dataset, it’s wise to perform a test upload with a small batch of data. This will help you identify potential issues and ensure that the upload process runs smoothly.
Test Upload Steps:
- Upload a small subset of your data to Epicor DMT.
- Check for validation errors or data mismatches.
- If no errors are found, proceed with the full upload.
Epicforce Tech Tip:
Test uploads save time and prevent big issues down the line. Use a limited dataset to verify that your template is structured properly before doing the final upload.
Step 6: Final Upload and Monitoring
Executing the Upload:
Once the template is validated and tested, you’re ready for the full upload. Upload the complete dataset to Epicor DMT, and monitor the process for any issues or errors.
Post-Upload Monitoring:
After the upload is complete, review the results and ensure the data is correctly integrated into the Epicor system. Address any errors or discrepancies quickly to maintain smooth business operations.
Why Choose Epicforce Tech for Epicor DMT Support?
At Epicforce Tech, we specialize in Epicor ERP implementations and provide comprehensive support for businesses using Epicor DMT. Our experienced team can guide you through the entire process, from data mapping to post-upload validation, ensuring a seamless experience and minimizing the risk of errors.
Benefits of Partnering with Epicforce Tech:
- Expert Support: Our team has extensive experience working with Epicor DMT and can provide tailored solutions for your business.
- Data Integrity: We ensure your data is clean, accurate, and ready for integration into Epicor.
- Seamless Migrations: With Epicforce Tech, your data migration process is efficient, reliable, and minimizes disruption to your operations.
Conclusion
Structuring Excel templates for Epicor DMT is a critical step in ensuring that your data migration process is efficient, accurate, and error-free. By following this step-by-step walkthrough, you can confidently prepare your data for upload and avoid common pitfalls. Whether you’re migrating data for inventory, sales orders, or other modules, taking the time to properly structure your templates will save you time, reduce errors, and make your migration process smooth.
Need help structuring your Excel templates for Epicor DMT? Epicforce Tech is here to guide you every step of the way.
Contact Us Today
To learn more about how Epicforce Tech can assist with your Epicor DMT data migration and integration needs, contact us today!
(888) 280-5585
info@epicforcetech.com
Read More:
How Epicforce Tech Helps You Master Epicor DMT for Seamless Data Management
How Epicforce Tech Helps You Automate Data Imports with Epicor DMT